
Cakes & pastry
7 Layered Dessert Cups with Sponge, Cream and Fruit
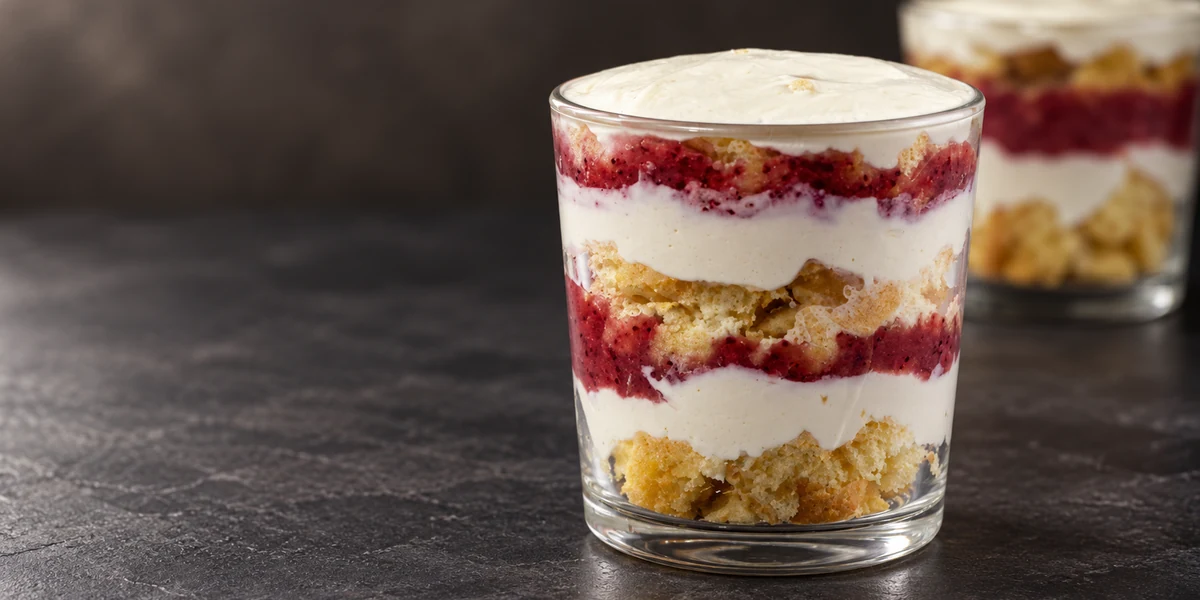
Layered dessert cups combine small pieces of sponge cake, a cream filling and fruit, caramel or chocolate in individual glasses. Cool every cooked component before assembly, use a piping bag for neat cream layers and chill the finished cups so the layers can settle. The seven recipes below make each component from scratch.
13 min read
Start with the glass and work backwards
Individual dessert cups give you the flavours of a layer cake without having to cover and decorate a whole cake. Clear glasses show the layers, so choose your serving cups before you bake. A narrow glass suits small cubes or crumbs; a wider cup gives you more room to alternate cake, cream and fruit.
You will need a mixer, baking tray, non-stick baking paper, spatula, knife and piping bag. All ingredient weights are for the stated component, so keep the cream for a filling separate from cream used in a ganache or caramel. The eggs in these recipes are medium eggs; the exact weight can vary by market.
These are cake-based dessert cups. They do not all follow the traditional combination of ingredients in a British trifle. Choose one complete recipe first so the sweetness and quantities belong together. Change flavours only after you know how the original layers behave.
Choose a dessert cup recipe
| Flavour | Cake layer | Cream and filling |
|---|---|---|
| Berry | Light sponge | Cream cheese, condensed milk and cooked berries |
| Banana caramel | Chocolate sponge | Cream cheese and caramelised banana |
| Cherry | Chocolate sponge | Whipped cream, condensed milk and cherries |
| Strawberry | Vanilla sponge | Whipped cream and strawberry filling |
| Peach | Chocolate sponge crumbs | Cream cheese and fruit |
| Peanut caramel | Chocolate sponge crumbs | Caramel pastry cream, peanuts and ganache |
| Chocolate | Chocolate sponge | Whipped milk-chocolate ganache |
1. Berry and cream cheese dessert cups
Start here for a simple fruit version. The cooked berry layer should be cool and thick enough to sit between the sponge and cream. Portion this small batch according to your own glasses.
Berry and cream cheese cups
One small batch; divide between cups according to their size
Ingredients
- 1 medium egg Sponge
- 40 g sugar Sponge
- 3 g baking powder Sponge
- 50 g plain flour Sponge
- 1 pinch salt Sponge
- 100 g 33% whipping cream, cold Cream
- 100 g cream cheese, cold Cream
- 50 g sweetened condensed milk Cream
- 100 g berries, fresh or frozen Berry layer
- 30 g sugar Berry layer
- 5 g cornflour / cornstarch Berry layer
Method
- Whip the egg. Preheat the oven to 170°C and line a baking tray. Whisk the egg, sugar and salt until pale, thick and airy. An egg at room temperature is easier to whip than one straight from the refrigerator.
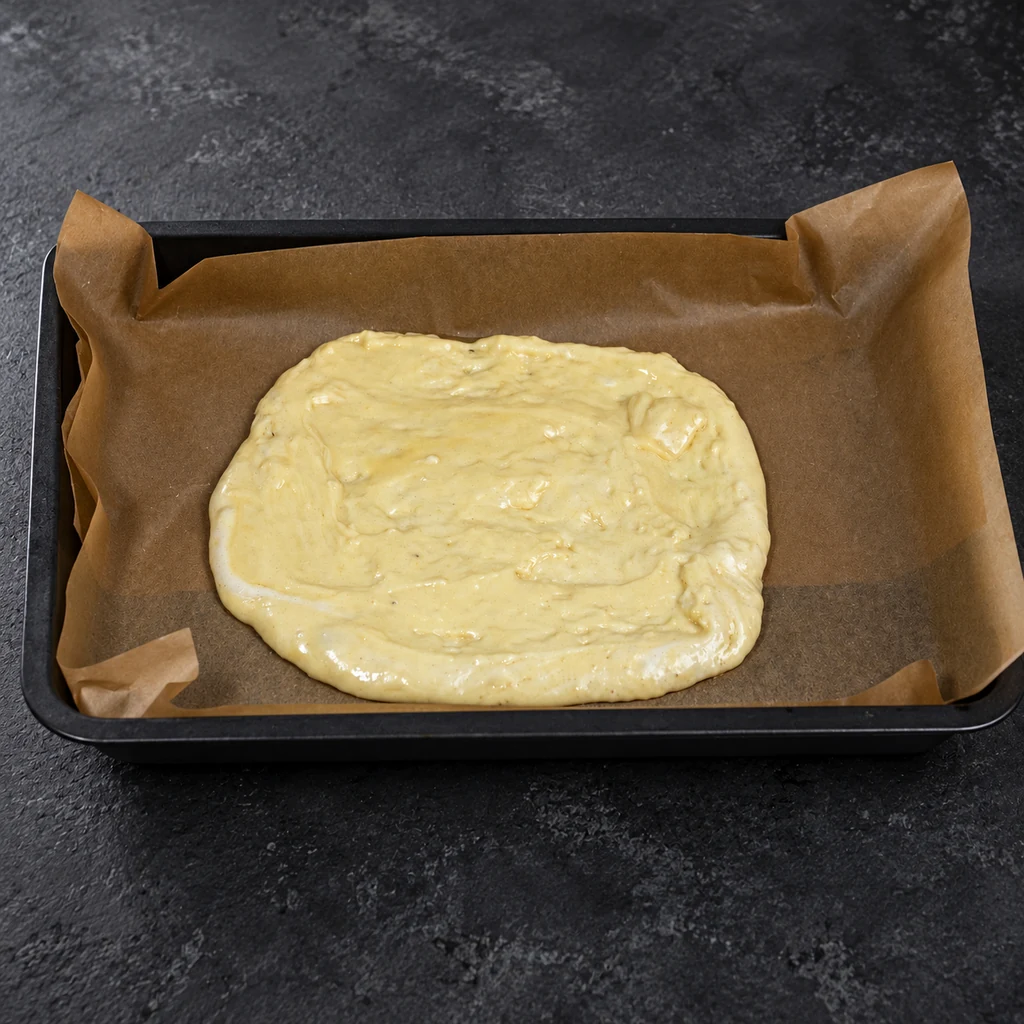
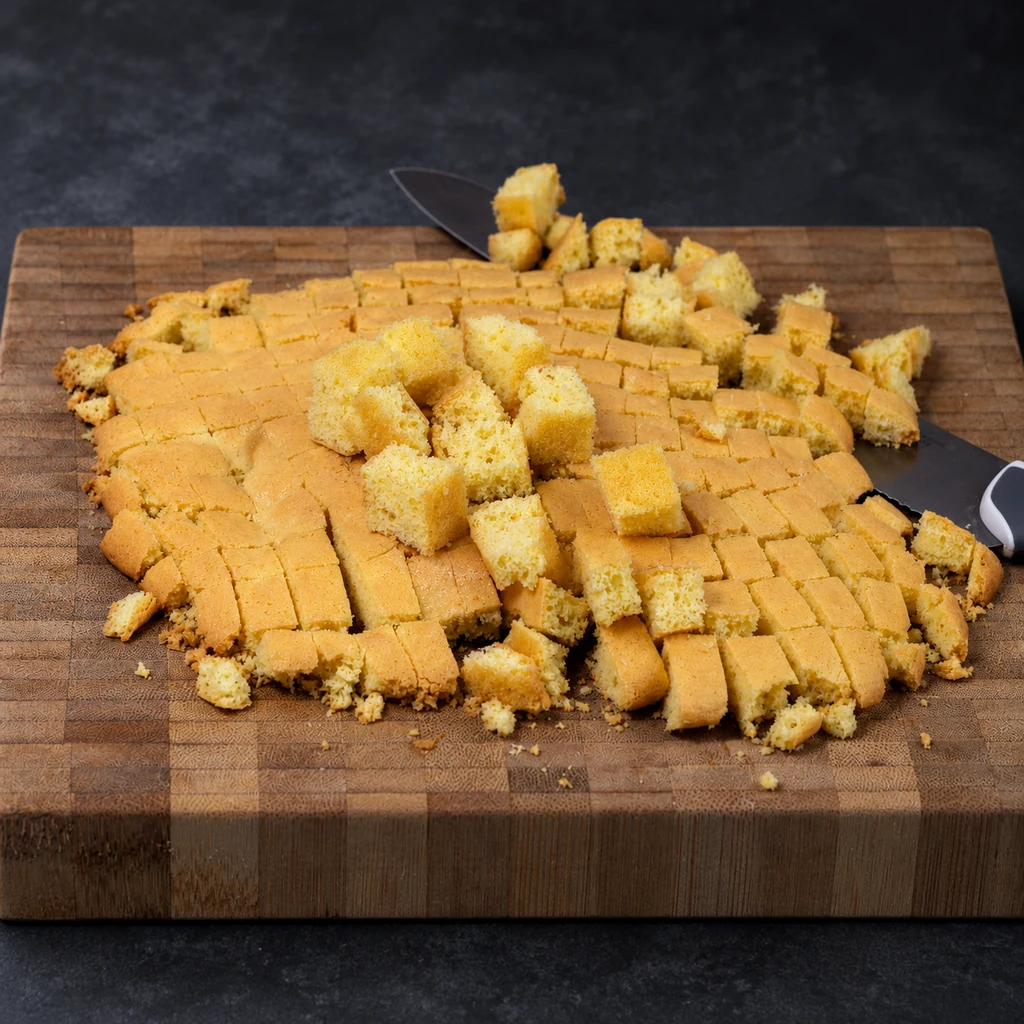
- Bake a thin sheet. Sift in the flour and baking powder and fold gently with a spatula. Spread as a thin sheet on the lined tray and bake immediately for about 10–15 minutes, until cooked through. Cool on a rack, then cut into small cubes.
- Cook the berries. Mix the sugar with the cornflour, then combine with the berries in a saucepan. Heat while stirring until the berries release juice and the mixture thickens and bubbles. Remove from the heat and cool completely.
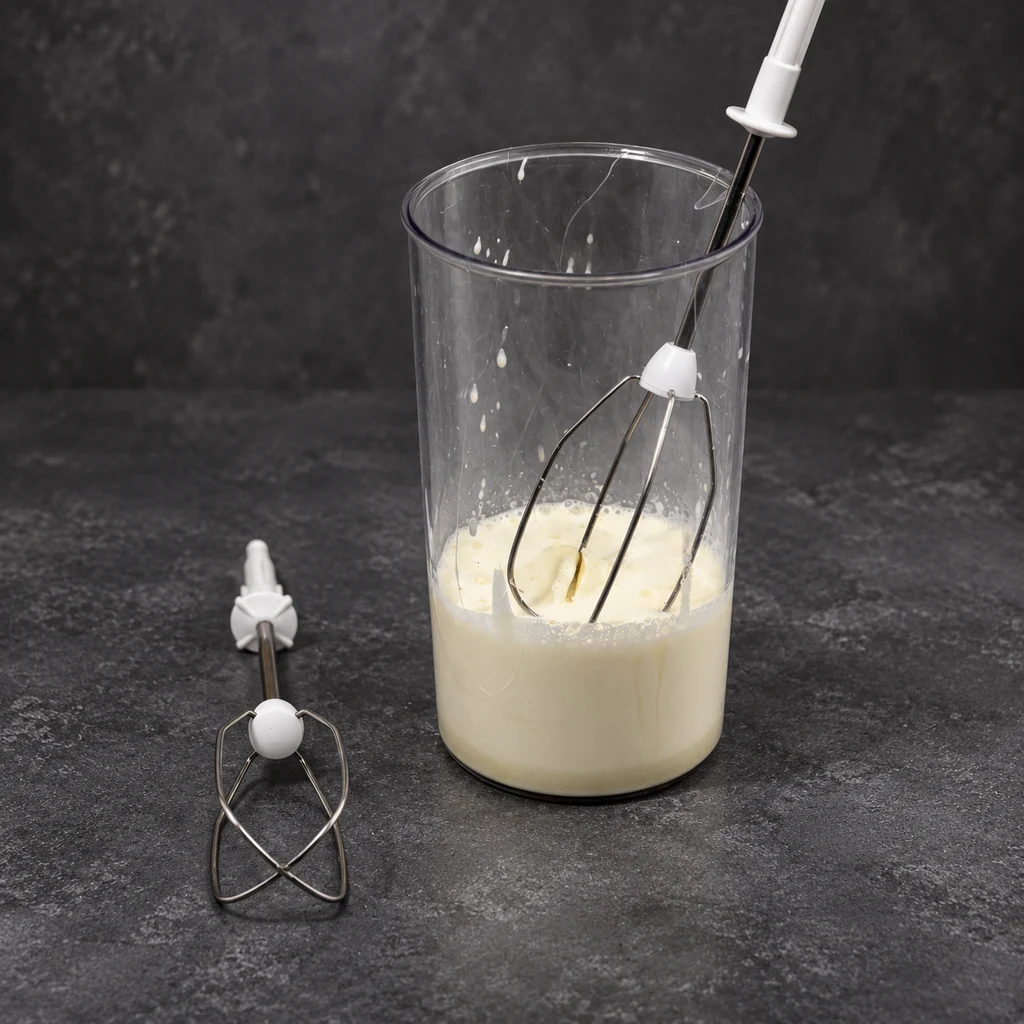
- Make the cream. Whisk the cold cream, cream cheese and condensed milk together until smooth and thick enough to pipe. Stop before the mixture becomes grainy.
- Layer the cups. Alternate sponge, cream and cool berry filling. Keep the amounts balanced so every spoonful has cake and cream rather than one thick, dry sponge layer. Refrigerate before serving.
2. Chocolate, banana and caramel cups
Caramelised banana gives this cup its main flavour. Let it cool before assembly; warm caramel and cold whipped cream do not make a stable layer.
Chocolate, banana and caramel cups
Approximately 5–6 small dessert cups; the final yield depends on cup size and layer proportions
Ingredients
- 1 medium egg Sponge
- 25 g sugar Sponge
- 3 g baking powder Sponge
- 40 g plain flour Sponge
- 20 g milk Sponge
- 10 g butter Sponge
- 10 g cocoa powder Sponge
- 1 pinch salt Sponge
- 100 g 33% whipping cream, cold Cream
- 200 g cream cheese, cold Cream
- 50 g icing sugar Cream
- 100 g sugar Banana layer
- 170 g peeled banana Banana layer
- 10 g butter Banana layer
Method
- Prepare the sponge. Heat the milk and 10 g butter gently until the butter melts, then let the mixture cool so it is warm rather than hot. Whisk the egg and sugar until pale and thick. Sift in the flour, cocoa, baking powder and salt, and fold gently.
- Add the milk and bake. Fold in the warm milk and butter mixture until combined. Spread the batter thinly on a lined tray and bake at 170°C for about 10–15 minutes, checking that the sheet is cooked through. Cool, then cut into pieces.
- Caramelise the banana. Melt the filling sugar in a heavy pan until amber. Carefully stir in the 10 g butter, then add sliced banana and cook briefly on both sides until coated and golden. Hot caramel can bubble when the fruit is added; keep your hands clear. Transfer the filling out of the hot pan and let it cool.
- Whip the cream. Combine the cold cream cheese, cream and icing sugar. Whisk until smooth and thick enough to pipe, without taking it to a grainy texture.
- Assemble. Layer the cool chocolate sponge, cream and caramelised banana in cups. Chill before serving. Add any decoration once the layers are in place.
3. Chocolate and cherry cups
The cherry layer is cooked with sugar but has no added starch. Use the juice deliberately to moisten the sponge, and keep enough cream between the fruit and cake to give a balanced spoonful.
Chocolate and cherry cups
Approximately 5–6 small dessert cups; the final yield depends on cup size and layer proportions
Ingredients
- 2 medium eggs Sponge
- 70 g sugar Sponge
- 5 g baking powder Sponge
- 90 g plain flour Sponge
- 40 g milk Sponge
- 20 g cocoa powder Sponge
- 30 g neutral vegetable oil Sponge
- 1 pinch salt Sponge
- 300 g 33% whipping cream, cold Cream
- 100 g sweetened condensed milk Cream
- 180 g pitted cherries Cherry layer
- 30 g sugar Cherry layer
Method
- Mix the sponge. Whisk the eggs, sugar and salt until pale and airy. Fold in the milk and oil, then sift in the flour, cocoa and baking powder. Combine gently without leaving dry pockets.
- Bake and cool. Spread the batter as a thin sheet on a lined tray. Bake at 170°C for about 10–15 minutes, until the centre is cooked. Cool on a rack and cut into cubes.
- Cook the cherry layer. Bring the cherries and sugar to a boil in a saucepan, stirring. Cook for a couple of minutes, then remove from the heat and cool completely. This is a juicy fruit layer, so add it in modest amounts rather than flooding the sponge.
- Whip the cream. Whisk the well-chilled cream with the condensed milk until it holds peaks and is suitable for piping. Watch the texture closely as it thickens.
- Build the cups. Alternate the sponge cubes, cream and cherries, using some cherry juice to moisten the sponge as needed. Refrigerate the assembled desserts and decorate before serving.
Compare a thicker cherry filling for a more defined fruit layer.
4. Strawberry and vanilla cream cups
A cooked strawberry layer carries flavour through the cup, while a few fresh slices against the glass add a clear fruit pattern. All cooked fruit must be cool before layering.
Strawberry and vanilla cream cups
Approximately 5–6 small dessert cups; the final yield depends on cup size and layer proportions
Ingredients
- 2 medium eggs Sponge
- 70 g sugar Sponge
- 5 g baking powder Sponge
- 80 g plain flour Sponge
- 15 g neutral vegetable oil Sponge
- To taste vanilla sugar Sponge
- 1 pinch salt Sponge
- 300 g 33% whipping cream, cold Cream
- 30 g fine sugar Cream
- 200 g strawberries, fresh or frozen Strawberry layer
- 30 g sugar Strawberry layer
- 5 g cornflour / cornstarch Strawberry layer
- A little cold water, just enough to make a smooth starch slurry Strawberry layer
Method
- Make the sponge. Whisk the eggs with the sugar and optional vanilla sugar until thick and airy. Fold in the oil, then sift in the flour, baking powder and salt and fold until combined.
- Bake a thin sheet. Spread the batter on a lined tray and bake at 170°C for about 10–15 minutes. Check doneness, cool on a rack and cut into cubes.
- Thicken the strawberries. Heat the strawberries with the sugar until they release juice. Mix the cornflour with a little cold water until smooth, stir it into the fruit and cook, stirring, until the mixture thickens and begins to bubble. Take it off the heat once the starch is cooked; avoid extended boiling. Cool completely.
- Whip the cream. Whisk the thoroughly chilled cream and fine sugar until it forms peaks suitable for layering. Do not continue once the cream begins to look coarse.
- Layer and finish. Alternate the sponge, cream and strawberry filling in cups. Thin strawberry slices can be placed against the glass for a visible fruit layer. Refrigerate, then finish with fresh decoration close to serving.
The cooked strawberry layer needs to cool before it touches the whipped cream.
5. Chocolate sponge and peach cups
Peaches bring a fresh contrast to chocolate crumbs and cream cheese. Use ripe prepared fruit, or drain canned fruit well. The same assembly can work with another fruit that suits the cream and does not release excessive loose juice.
Chocolate sponge and peach cups
Approximately 5–6 small dessert cups; the final yield depends on cup size and layer proportions
Ingredients
- 2 medium eggs Sponge
- 80 g sugar Sponge
- 5 g baking powder Sponge
- 40 g plain flour Sponge
- 30 g cornflour / cornstarch Sponge
- 15 g cocoa powder Sponge
- 1 pinch salt Sponge
- 300 g 33% whipping cream, cold Cream
- 150 g cream cheese, cold Cream
- 60 g icing sugar Cream
- 300 g prepared peaches, or another suitable fruit Fruit layer
Method
- Make the sponge. Whisk the eggs, sugar and salt until thick and airy. Sift in the flour, cornflour, cocoa and baking powder and fold gently until combined.
- Bake and crumble. Spread thinly on a lined tray. Bake at 170°C for about 15 minutes, checking that it is cooked through. Cool completely, then crumble the sheet or pulse it briefly into crumbs.
- Prepare the cream. Whisk the cold cream and icing sugar until it holds peaks. Briefly smooth the cream cheese in a separate bowl, then mix it into the whipped cream just until the mixture is even and thick enough to pipe.
- Prepare the fruit. Cut the prepared peaches into small pieces. If using canned fruit, drain it well first. Keep especially juicy fruit in small pieces and avoid transferring a pool of loose liquid into the cups.
- Assemble. Layer sponge crumbs, cream and fruit. Keep fruit that is likely to brown or dry out inside the dessert rather than leaving it exposed on top. Refrigerate the cups before serving.
6. Peanut, caramel and chocolate cups
This is the most involved option in the collection. Make the sponge, caramel, ganache and pastry cream before you start filling glasses. Keeping the components organised makes the final assembly straightforward.
Peanut, caramel and chocolate cups
Approximately 5–6 small dessert cups; the final yield depends on cup size and layer proportions
Ingredients
- 2 medium eggs Sponge
- 60 g sugar Sponge
- 5 g baking powder Sponge
- 60 g plain flour Sponge
- 20 g cocoa powder Sponge
- 1 pinch salt Sponge
- 100 g sugar Caramel
- 150 g 33% whipping cream Caramel
- 1 pinch salt Caramel
- 1 medium egg Caramel pastry cream
- 40 g sugar Caramel pastry cream
- 150 g milk Caramel pastry cream
- 60 g prepared caramel, taken from the batch above Caramel pastry cream
- 30 g butter Caramel pastry cream
- 10 g cornflour / cornstarch Caramel pastry cream
- 100 g milk chocolate, chopped Ganache
- 100 g 33% whipping cream Ganache
- 100 g roasted, unsalted peanuts Peanut layer
Method
- Bake the sponge. Whisk the eggs, sugar and salt until thick and airy. Sift in the flour, cocoa and baking powder and fold gently. Spread thinly on a lined tray and bake at 170°C for about 10–15 minutes. Cool completely and crumble.
- Make the caramel. Warm the 150 g cream in one saucepan. In another heavy saucepan, melt the 100 g sugar to an amber caramel. Take the caramel off the heat and add the warm cream gradually, keeping clear of the steam and bubbling. Return to gentle heat and stir until smooth; cook for about 5 minutes as needed to combine and thicken. Stir in the salt and cool.
- Make the ganache. Heat the 100 g cream until just beginning to boil. Pour it over the chopped milk chocolate, let it stand briefly, then stir gently from the centre until smooth. Cover the surface and chill until it has thickened but remains usable as a topping.
- Cook the pastry cream. Combine the egg, 40 g sugar and cornflour in a saucepan until smooth. Mix in 60 g of the prepared caramel and the milk. Heat while whisking constantly, including around the pan corners, until thick and bubbling. Continue whisking at a gentle boil for about 1 minute, then remove from the heat and mix in the butter. Transfer to a shallow container, cover the surface and cool, then refrigerate.
- Prepare the peanut layer. Coarsely chop the peanuts and mix them with the remaining cool caramel. Keep the texture spoonable; the peanuts should remain distinct pieces.
- Assemble the cups. Alternate sponge crumbs, cool caramel pastry cream and caramel-coated peanuts. Leave space for a final layer of ganache. Add a little chopped peanut or chocolate decoration, then refrigerate.
This recipe has several components. Make and cool them before assembly; a warm custard or caramel will soften the layers.
The 60 g caramel in the pastry cream is taken from the caramel already made, not an additional batch.
Explore another caramel method and its texture cues.
Check a ganache that looks oily or separated before you use it.
7. Chocolate sponge and whipped ganache cups
This version keeps the flavours focused on chocolate. Whipping changes a chilled ganache into a lighter cream; it does not replace the cooling stage, and overwhipping can make the texture coarse.
Chocolate sponge and whipped ganache cups
Approximately 5–6 small dessert cups; the final yield depends on cup size and layer proportions
Ingredients
- 1 medium egg Sponge
- 90 g sugar Sponge
- 90 g plain flour Sponge
- 20 g cocoa powder Sponge
- 50 g butter, softened Sponge
- 50 g neutral vegetable oil Sponge
- 90 g plain kefir or fermented baked milk Sponge
- ⅓ tsp baking powder Sponge
- ⅓ tsp bicarbonate of soda / baking soda Sponge
- 250 g 33% whipping cream Chocolate cream
- 250 g milk chocolate, chopped Chocolate cream
Method
- Start the batter. Beat the softened butter with the sugar until light. Mix in the egg, then the oil, combining after each addition. Sift the flour, cocoa, baking powder and bicarbonate of soda together.
- Finish and bake. Fold in half the dry mixture, then the kefir or fermented baked milk, then the remaining dry ingredients. Spread as a thin sheet on a lined tray and bake at 170°C for about 10–15 minutes. Check doneness, cool on a rack and cut into cubes or crumble.
- Make the ganache. Heat the cream until it is just beginning to boil and pour over the chopped chocolate. Let it stand briefly, then blend until smooth, keeping the blender head submerged to avoid adding air.
- Cool before whipping. Cover the ganache surface and refrigerate until thoroughly cold and set. Whisk with a mixer just until it becomes lighter in colour and aerated. Watch closely and stop before it turns coarse.
- Layer the dessert. Alternate the cool sponge with the whipped ganache. A piping bag helps keep the glass clean and gives an even layer. Refrigerate before serving.
Use the fermented dairy specified here. Replacing it with ordinary milk changes the acidity of a batter that contains bicarbonate of soda.
Ganache needs time to chill before whipping; the recipe is not a last-minute warm assembly.
Keep the layers neat and balanced
Pipe the cream instead of dropping it from a spoon against the glass. Add sponge in a reasonably even layer without packing it into a hard plug. If using fruit slices around the wall, position them before piping cream into the centre.
Let the assembled cups chill for around 3–4 hours before serving so the layers settle and the sponge has time to take up some moisture. This is an assembly resting period, not a shelf-life promise. Keep desserts containing cream, cream cheese, custard or ganache refrigerated.
Add toppings that can soften, brown or lose their shape close to serving. A few berries, chocolate shavings, crumbs or chopped nuts are enough. Match the decoration to what is inside rather than hiding the layers beneath a large pile of unrelated toppings.
Can you make dessert cups from cake trimmings?
Yes, if the sponge and cream are sound, properly handled and still suitable to serve. Dessert cups can make good use of clean trimmings from a cake you have just prepared. Cool and store the components appropriately, then choose a filling that matches them.
A cup does not repair a badly baked sponge, spoiled cream or a filling with an unpleasant texture. Taste and assess each component before assembling. For repeatable batches, record the weight of sponge, cream and fruit in one finished cup, then use that as your portioning guide.
Common questions
Do I have to bake a separate sponge for every flavour?
For your first attempt, follow one complete recipe. Once you know the textures, suitable baked sponge trimmings can be used with a matching cream and filling. Check their condition and handling history before using them.
Can I use frozen berries?
Yes, the cooked berry fillings can use fresh or frozen fruit. The water released varies, so cook to the stated thickened texture and cool the filling before adding it to cream.
Why are my dessert cup layers sliding together?
Check for warm sponge or filling, excess fruit juice and cream that is too loose. Cool the components fully, use controlled quantities and chill the assembled cups.
Can I make these cups without cream cheese?
Choose a recipe already built around another filling, such as the cherry, strawberry or chocolate version. Leaving cream cheese out of a formula designed to use it changes the texture and the amount of cream.
Does every recipe make exactly six 200 ml cups?
No. Cup capacity, how high you fill it and the proportion of each layer affect the yield. The stated batch sizes are approximate; make one reference portion if you need consistent servings.