
Cakes & pastry
Meringue Lollipops for Cake Decoration
Meringue lollipops are piped egg-white-and-sugar shapes dried around baking-safe sticks. Dissolve the sugar over a water bath, whip to a firm glossy meringue, colour if desired and pipe onto a lined tray. Dry gently at 70–80°C until firm and dry through the centre, then cool before packing.
4 min read

Prepare the tray, sticks and colours
Use a clean, grease-free bowl and whisk. Prepare the lined tray and piping bag before whipping so the finished meringue can be piped promptly. A round tip gives a smooth design; a star tip produces ridges that show the direction of the piping.
Choose sticks specifically suitable for baking at the temperature used. Ordinary plastic craft sticks are not a substitute. Leave enough of each stick outside the meringue to hold the finished decoration without making the edible part too thin.
Use pasteurised whites suitable for whipping. This method warms the whites to dissolve sugar without a specified cooking temperature.
Whip and pipe the meringue
Piped meringue lollipops
Ingredients
- from 2 medium eggs pasteurised egg whites suitable for whipping
- 180 g fine sugar
- 1 pinch salt
- optional water-soluble gel or powder food colouring
Method
- Set up a water bath. Heat water in a saucepan and set a heatproof bowl above it. The bowl base should not touch the water.
- Dissolve the sugar. Combine the whites and sugar in the bowl. Stir continuously over the bath until the sugar dissolves and the mixture feels smooth rather than gritty.
- Whip. Remove from the bath, add the salt and whip until the meringue is firm and glossy. Start at a controlled speed, then increase as the foam develops.
- Colour if desired. Mix in a small amount of suitable food colouring. For more than one colour, divide the meringue and colour each portion separately without excessive stirring.
- Pipe around the sticks. Pipe a small anchor of meringue on parchment, place the baking-safe stick over it and pipe the main shape over the end of the stick so it is enclosed securely.
- Dry. Dry in a preheated 70–80°C (158–176°F) oven, starting checks after about an hour. Continue as needed until the pieces are firm, release from the lining and are dry through the centre.
- Cool and pack. Cool completely before lifting by the sticks or placing in a closed container. Handle the meringue shape gently until you have checked that the stick is secure.
Drying time varies with the thickness and size of the shape. A firm surface can hide a soft centre.
Use a small test shape to check dryness rather than breaking every decoration.
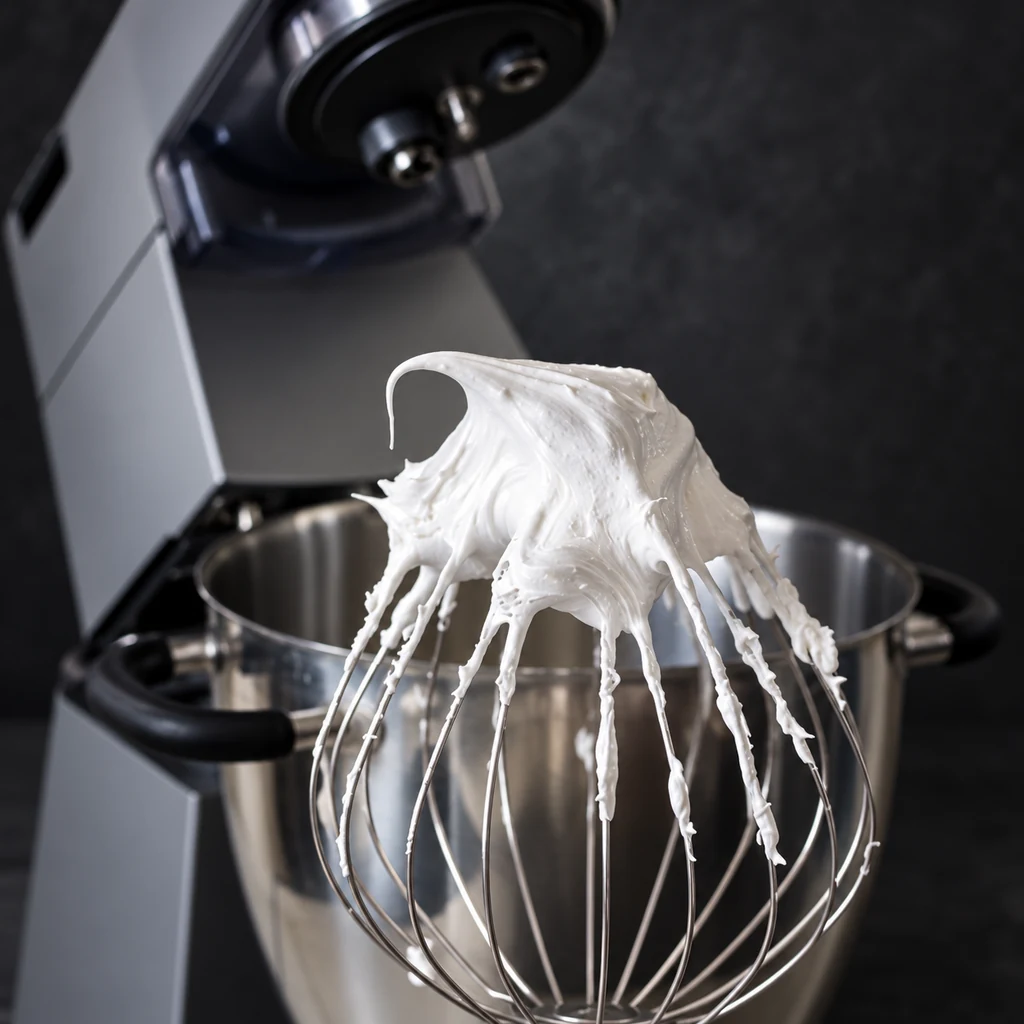
Keep the shape clear
Concentrated gel or powder colour changes the shade without adding much water. Add a little at a time and stop when the colour is even. Large amounts of a thin liquid colour can loosen the meringue.
For a two-colour effect, place coloured portions along different sides of the bag so they meet at the nozzle. Avoid stirring the filled bag, which merges the colours before piping. Pipe a small test to check the pattern and pressure.
Simple rosettes, clouds, hearts and numbers are useful starting shapes. Keep the main edible area thick enough to grip the stick, and avoid delicate extensions that break when lifted. For consistent sets, draw guides on the reverse of the parchment.
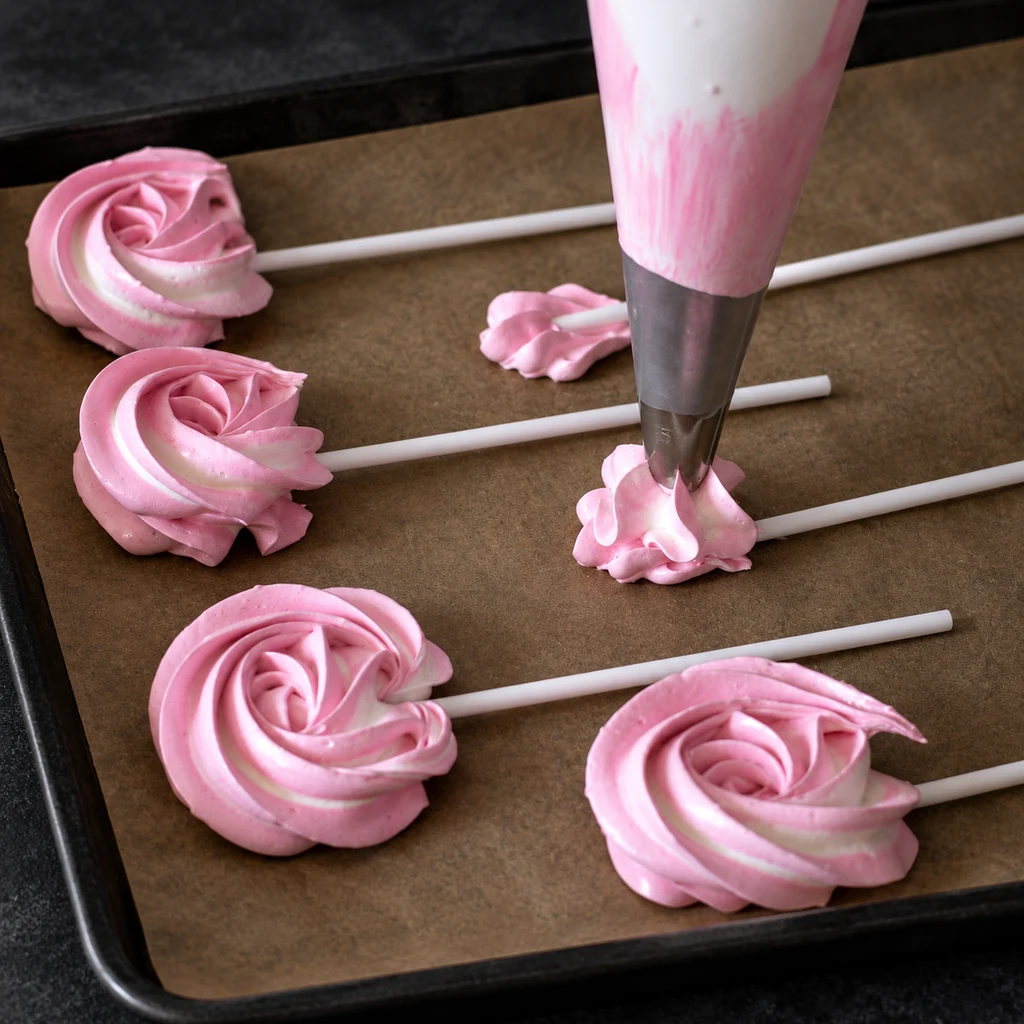
Use low heat and a complete drying endpoint
Meringue decorations should dry rather than bake into a browned shell. If the colour changes quickly, check the actual oven temperature and move away from an intense heating element. A household oven may run hotter than the dial suggests.
Thicker shapes take longer than thin outlines. Rotate or change tray positions only when needed and handle the tray gently. The aim is a dry centre as well as a crisp outside.
Let the pieces cool before evaluating their final crispness. Warm meringue can feel different from a cooled piece, and packing it warm allows moisture to condense inside the container.
Protect the finish from moisture
Store fully cooled pieces in a dry airtight container until needed. Humidity makes meringue sticky, so avoid leaving the decorations exposed beside steam, a dishwasher or an open window on a damp day.
A cream-covered cake still needs the refrigeration required by its filling. Do not leave the cake warm to protect the meringue. Instead, keep the decorations separately and add them close to presentation.
Place the sticks securely in a suitable cake or holder without forcing the brittle meringue itself. Tell anyone cutting or eating the cake where the sticks are, and remove them before serving portions. For a chocolate decoration, a different technique may suit a moist surface better.
Make chocolate lettering as another cake-decoration technique.
Common questions
Can I use ordinary plastic sticks?
No. Use sticks explicitly suitable for baking at the temperature used.
How long do they need in the oven?
Start checking after about an hour at 70–80°C, then continue until dry through the centre. Thickness and oven behaviour change the time.
Why have they turned sticky?
Meringue absorbs moisture from humid air and moist surfaces. Cool fully, store dry and attach to cream-covered cakes near presentation.
Can I refrigerate a decorated cream cake?
The cake must follow its filling’s chilled-storage needs. Keep the meringue separate until close to serving when possible.