
Cakes & pastry
Apple Marshmallows with Gelatin
These apple marshmallows use gelatin for a soft, springy set. Cook apple puree with sugar and water to 110°C, stream it into whipped egg whites, then incorporate melted bloomed gelatin. Whip until the mixture holds clear ridges, pipe onto a lightly oiled silicone mat and allow about 12 hours to set.
5 min read

Start with thick, smooth apple puree
Roasted apples give a concentrated puree without adding cooking water. Core the apples but leave the skins on for roasting, then blend and pass the softened fruit through a sieve. Weigh 150 g of the finished puree for the recipe.
You need more fresh apple than finished puree because cores are removed and water evaporates. Buy extra and weigh the prepared result rather than assuming one apple or one spoonful is a fixed amount. Chill the puree after preparation if making it ahead.
Use pasteurised egg whites that are suitable for whipping. The hot syrup alone does not ensure that all the egg white is fully cooked.
Check the bowl and whites if they are not developing a stable foam.
Cook, whip and pipe
Piped apple marshmallows
Ingredients
- 100 g pasteurised egg whites suitable for whipping
- 15 g vanilla sugar
- 1/2 tsp citric acid
- 200 g sugar
- 60 g water for the syrup
- 150 g thick apple puree
- 18 g powdered gelatin
- 110 g cold water for blooming gelatin
- as needed icing sugar for dusting
- a thin film neutral oil for the mat
Method
- Bloom the gelatin. Sprinkle the gelatin into the 110 g cold water and leave to hydrate fully.
- Prepare the puree. Roast cored apples with their skins at 180°C (356°F) until soft. Blend and sieve, then weigh 150 g puree. Prepare the piping bag and lightly oil a silicone or suitable non-stick mat.
- Cook the fruit syrup. Combine the puree, 200 g sugar and 60 g water in a saucepan. Cook while stirring to 110°C (230°F), monitoring with a thermometer.
- Whip the whites. As the syrup approaches its endpoint, whip the egg whites with the vanilla sugar and citric acid until voluminous.
- Add the hot syrup. Continue whipping and pour the fruit syrup into the whites in a thin steady stream, keeping it away from the moving whisk and the side of the bowl.
- Add gelatin. Melt the bloomed gelatin gently without boiling. Pour into the mixture while continuing to whip.
- Reach the piping texture. Keep whipping until the mass becomes thick, holds clear ridges and gathers visibly around the whisk, leaving defined hollows at the bowl edges.
- Pipe and set. Transfer promptly to a sturdy piping bag fitted with a large nozzle. Pipe onto the prepared mat and allow approximately 12 hours to set in a cool, clean place. Dust the set pieces with icing sugar.
The 60 g syrup water and 110 g gelatin water are separate measured portions.
Gelatin strength affects firmness; keep a record of the product used when repeating the batch.
Watch the mass, not just the mixer time
A mixture that still flows freely will lose its pattern after piping. Continue until ridges stay visible and the mass has enough body to hold a small test shape. The change in texture is more useful than assuming every mixer reaches it in the same number of minutes.
The syrup endpoint matters because excess water leaves the finished mixture harder to stabilise. Use a thermometer and stir the fruit syrup to prevent catching. Do not raise the temperature beyond the formula simply to hurry the next stage.
Work promptly once the texture is ready. Gelatin begins to set as the mass cools, so prolonged delays in the bowl or bag make piping harder. Prepare the tray and bag before the syrup is cooked.

Use a large nozzle and a strong bag
A nozzle opening around 8–12 mm is a practical starting point for this dense mixture. For round pieces around 5 cm across, pipe a short expanding spiral with steady pressure. Start with simple shapes before attempting fine details.
An open-star nozzle gives visible ridges, while a round nozzle produces a smoother surface. Keep the nozzle just above the mat and stop squeezing before lifting away. A small test piece shows whether the mixture is holding its outline.
Use a robust food-safe piping bag. A thin bag that balloons under pressure makes control difficult. If you need to pause, keep the pause short and avoid leaving the filled bag in a warm place.
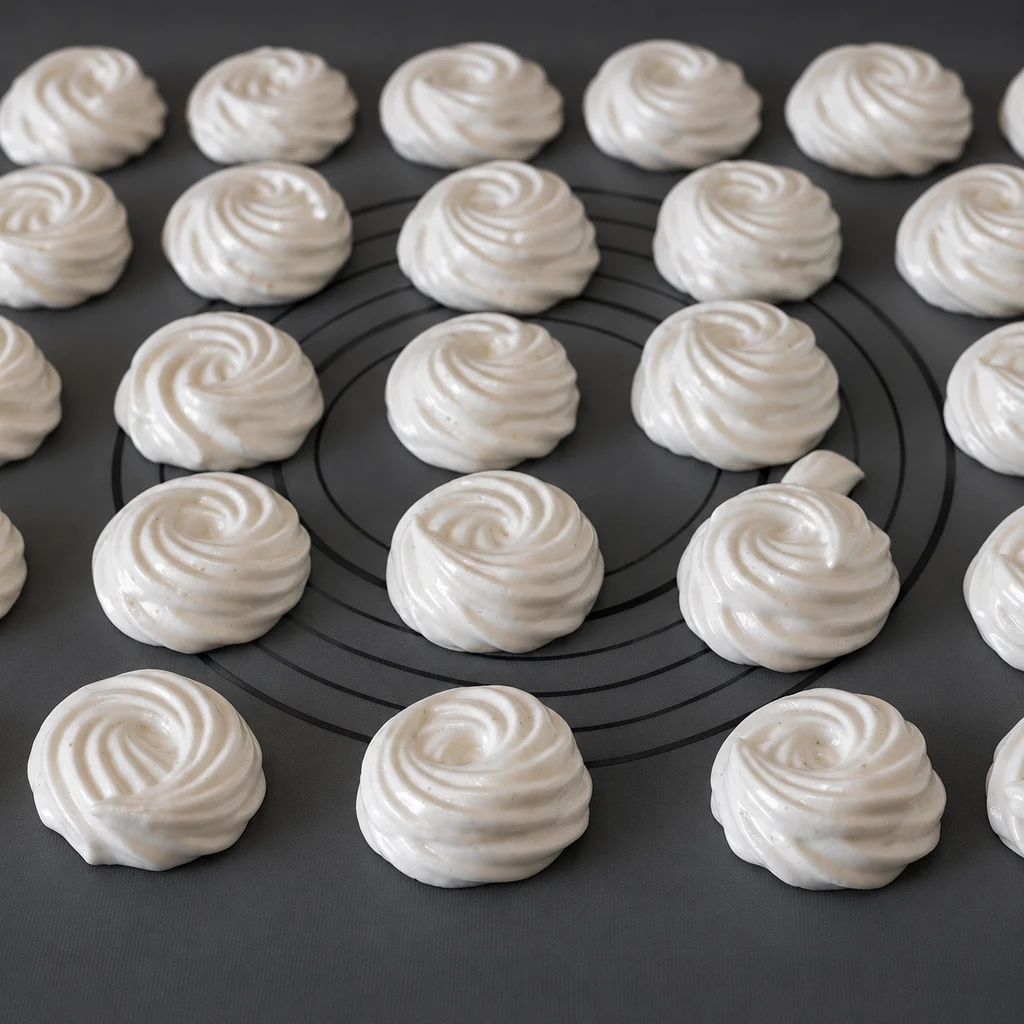
Release carefully and keep the texture dry
A lightly oiled silicone or suitable non-stick mat allows the set pieces to release more cleanly than absorbent paper. Apply only a thin film of oil; a greasy surface is not the goal. Lift a test piece gently before removing the entire batch.
Dust with icing sugar after the surface and structure have set. Packing pieces while they are still warm or damp traps moisture and makes the finish sticky. Keep finished pieces in a clean covered container away from heat and humidity, and make them close to serving.
This gelatin version is springier than a conventional agar-based zephyr. Do not transfer agar timing, freezing expectations or storage promises to it automatically. If you change the gelling ingredient, use a formula designed for that system.
Understand why switching gelatin and agar changes the method.
Common questions
Can I use apple sauce straight from a jar?
Only if it has a suitable thick, smooth texture and compatible ingredients. A watery or sweetened puree changes the formula.
Are both water quantities needed?
Yes. Use 60 g for the fruit syrup and 110 g for blooming gelatin.
What tells me it is ready to pipe?
The thick mass holds clear ridges and gathers around the whisk. A small piped test should keep its outline.
Is this identical to agar-based zephyr?
No. Gelatin gives a different, springier texture and needs its own method.