
Mousse & pastry
How to Slice a Sponge Cake into Even Layers
Let the sponge cool completely before slicing. For many layer-cake sponges, a wrapped rest in the refrigerator makes the crumb easier to cut. Mark a level line around the cake, keep the blade or wire parallel to the board and support each layer as you lift it. Pressing a warm cake flat cannot make an even layer.
6 min read
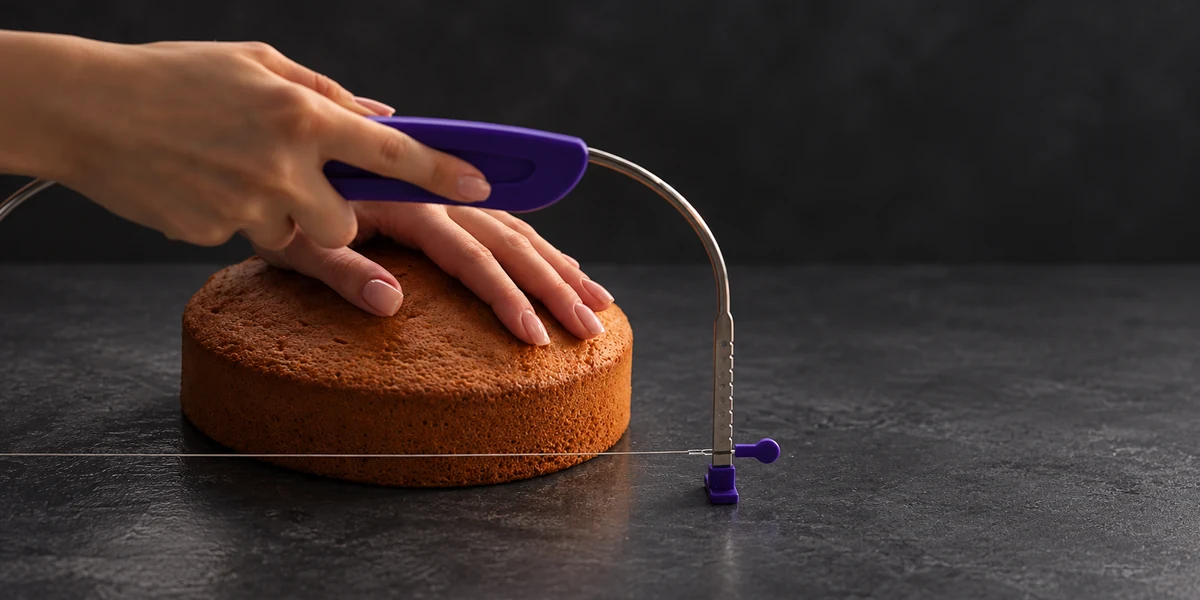
Prepare the sponge before picking up a knife
A warm sponge is fragile. Its crumb can compress under your hand, tear around the knife and stick together at the cut. Wait until the centre is fully cool, then follow the recipe’s resting instructions. A wrapped 6–12 hour refrigerated rest is useful for many classic layer-cake sponges, but it is not a compulsory treatment for every foam cake.
Wrap only after cooling so that you do not trap steam against the crust. If the sponge was frozen, let it become cuttable while protected from drying out. Do not force a blade through a solid frozen block.
Check the cake before dividing it. A wet, gummy centre is a baking problem, not something a clever slicing tool will repair. If the top is domed, trim the dome separately and measure the usable level height below it.
Choose the layer depth and mark the cut
Set the cake on a flat board or a stable turntable. Decide how many sponge layers the usable height can realistically provide. Layers around 1.5–2 cm are a common starting point for many filled sponge cakes, but the recipe and crumb strength should decide the final thickness.
Measure from the board at several points around the cake and make shallow marks at the same height. The marks give you a level route even if the top is uneven. If you use toothpicks as visual guides, count them and remove every one before assembly.
For repeated cuts, keep a consistent reference surface. A wire cutter with both feet on the board measures from that board; a knife guided by the cake’s sloping top will reproduce the slope.
Method 1: a long serrated knife
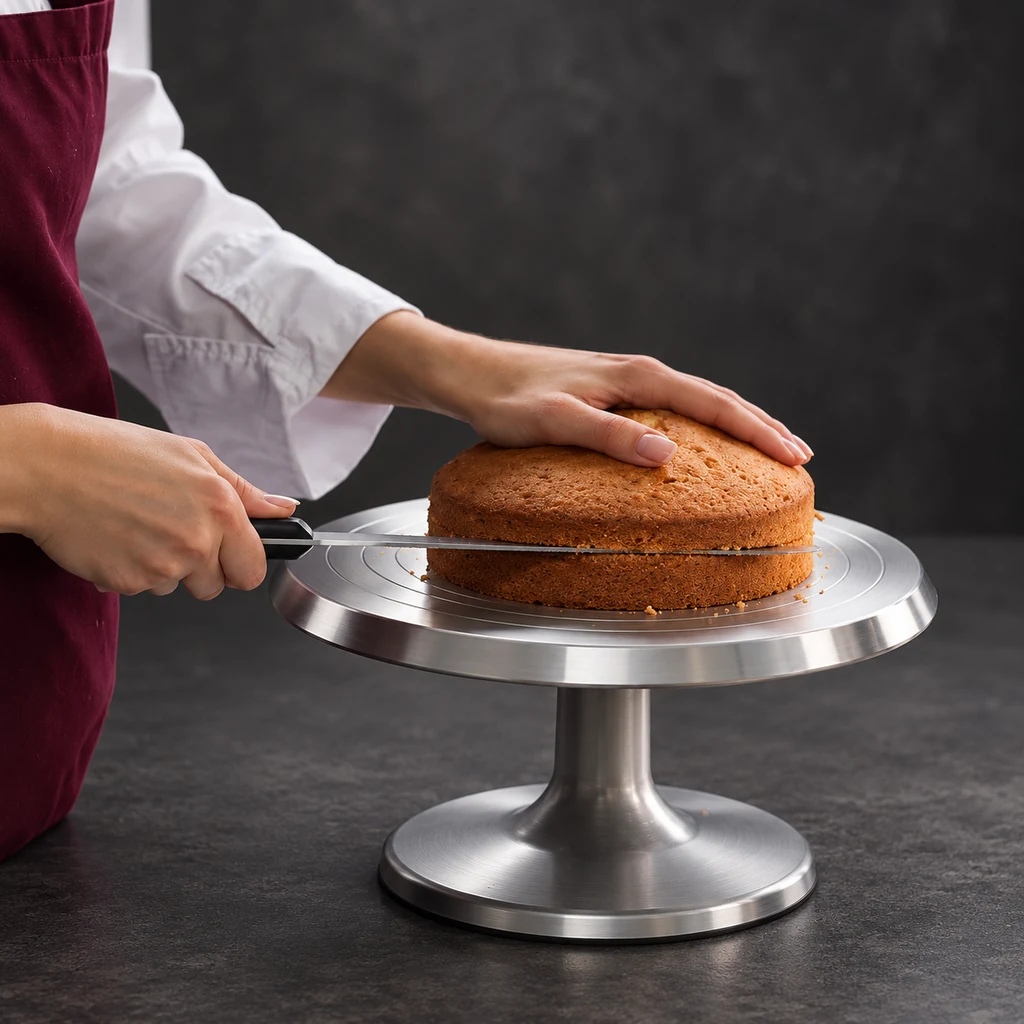
Choose a food-safe serrated knife long enough to reach across the cake comfortably. Let the teeth do the cutting with a gentle sawing movement. Your upper hand steadies the cake lightly; it should not squeeze the crumb.
A turntable helps you maintain the same height while working gradually around the edge. A clean, stable height guide beside the cake can also help, provided it does not make the blade slip or place your fingers in its path.
- Score a shallow horizontal line around the circumference at the measured height. Rotate the cake while keeping the knife level.
- Continue around the cake, gradually cutting farther towards the centre. Follow the scored line rather than pushing straight through from one side.
- Keep the blade parallel to the board. If the far end rises or drops, pause and correct the angle before continuing.
- Finish the cut gently and slide a cake lifter or thin board beneath the top layer. Lift with support across the layer, not by pulling one edge.
Method 2: food-safe thread
Thread can work on a cooled sponge with a relatively firm, even crumb. Use clean unflavoured food-safe thread intended for contact with food. Ordinary sewing thread or fishing line may have coatings and is not a good default choice.
First score the crust with a knife along the marked line. A thread can compress a thick crust before it cuts through it. Place the thread into the groove all the way around the cake, cross the ends and pull them steadily in opposite directions while keeping the loop level.
Support the last edge as the thread exits. If the cake starts to squash instead of cutting, stop and use a suitable knife. A very soft chiffon or a thin fragile sponge may not suit this method.
Method 3: a cake wire leveller
A purpose-made wire leveller sets the cutting height on both sides. Adjust the two ends equally and check that the wire is taut and securely attached. The cake must fit under the frame without being compressed.
Keep both feet in contact with the board throughout the cut. Use a small back-and-forth motion and advance slowly. Pushing the tool straight through with force can bow the wire or drag the crumb, giving a curved cut.
A hard crust can need a shallow knife score before the wire passes through. Support the exit edge and lift the separated layer on a board. Set the next height carefully rather than assuming the tool stayed in position.
Slicing rings, knife guides and sheet cakes
A slotted slicing ring guides a long knife through openings at a set height. Make sure it fits securely and is intended for slicing; do not assume a perforated slicing guide is also a baking pan. Knife-height guides can help too, but both sides must be set equally and remain stable.
You can also bake a sponge as a sheet and cut matching shapes from it when the recipe is designed for a thin bake. This avoids horizontal slicing, but it changes the baking time and creates trimmings. Map the circles or rectangles before mixing so that the sheet is large enough.
Do not balance a cake on an unstable stack of plates just to raise it to the lip of a pan. A steady board and a marked line are easier to control.
Move and assemble the cut layers
Keep the layers supported as you transfer them. Place a thin board or broad cake lifter beneath each one, then slide it into position. Very thin layers can break even when the cut itself was clean.
Check the thickness from several sides before filling. A small trimming correction now is easier than hiding a wedge-shaped layer under extra cream. Keep clean trimmings covered if you plan to use them in another dessert.
Common questions
Should I slice sponge cake while it is hot?
No. Let the centre cool completely. Warm crumb can compress or tear, making it harder to achieve even layers.
Is a wire cutter always better than a knife?
No. A wire is convenient for a cake that fits the frame and has a suitable crumb. A long serrated knife is more flexible for wide cakes or firm crusts.
Can I cut the cake straight from the freezer?
Do not force the knife through a solid block. Thaw the protected sponge until it is safely cuttable, following the storage plan for the recipe.
Why is my cut sloping?
The blade may be tilted, the turntable may be uneven or one foot of the wire cutter may have lifted. Mark the same height all around and keep your reference surface level.