
Cakes & pastry
Edible Sponge Moss for Cakes: A Microwave Recipe
Edible sponge moss is a light, porous cake torn into irregular pieces for decoration. This version uses one egg, sugar, honey or invert syrup, flour and baking powder, then cooks in microwave-safe cups filled only one-third full. Green water-soluble food colouring creates the moss effect; a siphon is not required.
6 min read
What is edible sponge moss?
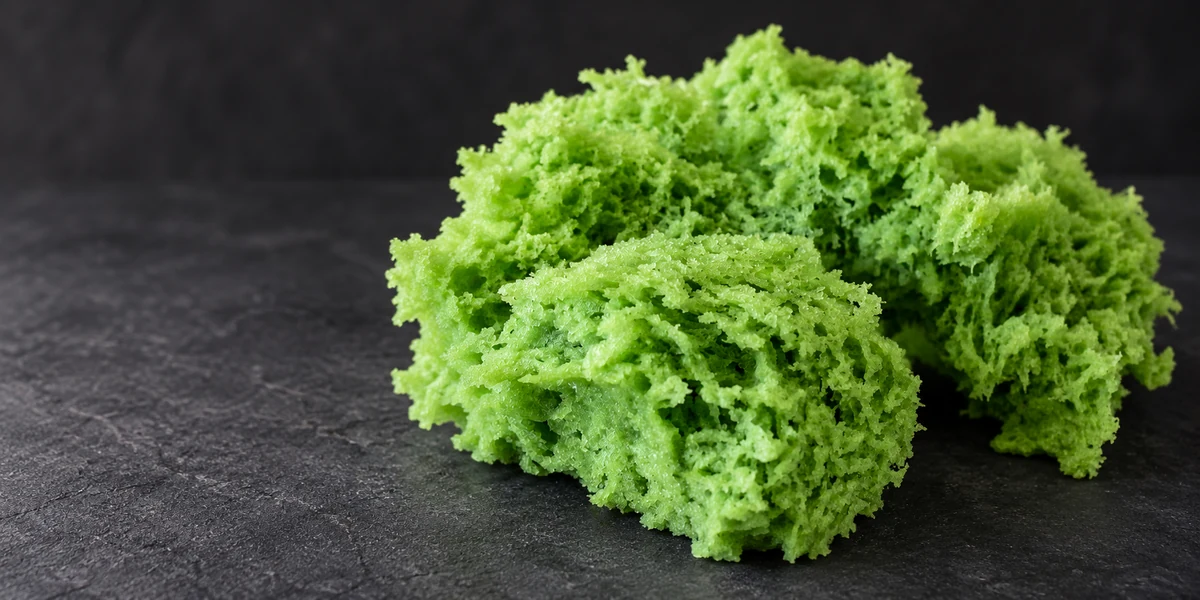
Sponge moss gives a cake the appearance of grass, moss or a small landscape while remaining edible. Its open, irregular crumb is the main visual feature. Tearing the sponge exposes that texture more naturally than cutting it into neat cubes.
Some aerated sponge methods use a whipping siphon, but this version uses an egg foam and baking powder. You only need a mixer, a spatula and a microwave, together with cups explicitly suitable for microwave cooking.
Think of it as a decorative component rather than a layer-cake sponge. The small pieces can add colour and texture, but they are not designed to support a heavy filling or replace a cake layer.
Microwave sponge moss recipe
Use a scale accurate enough for the small flour and baking-powder quantities. At this batch size, an extra spoonful changes the balance substantially. Use water-soluble food colouring intended for food, and check its dosing instructions.
Choose microwave-safe cups without metallic decoration. Ordinary disposable plastic or paper cups are not automatically suitable for heating. If the container is not approved for microwave use, choose another one.
Green edible sponge moss
A small batch of cake decoration; cup count depends on cup capacity
Ingredients
- 1 egg
- 15 g caster sugar / fine granulated sugar
- 30 g runny honey or invert syrup
- 12 g plain flour / all-purpose flour
- 5 g baking powder
- as needed water-soluble green food colouring, within its labelled use level
Method
- Prepare the dry mixture. Weigh the ingredients. Mix the flour and baking powder thoroughly so the raising agent is evenly distributed.
- Whip the egg and sugar. Whisk the egg with the sugar on high speed until increased in volume. The whisk should leave a trail that remains briefly on the surface; the mixture does not need to become extremely stiff.
- Add the honey. Mix in the runny honey or invert syrup. If it is too thick, warm it gently first and let it cool before adding it to the egg mixture.
- Fold and colour. Sift the flour mixture over the egg foam. Fold gently with a spatula until combined, adding the water-soluble colouring at this stage and adjusting the shade within its recommended dosage.
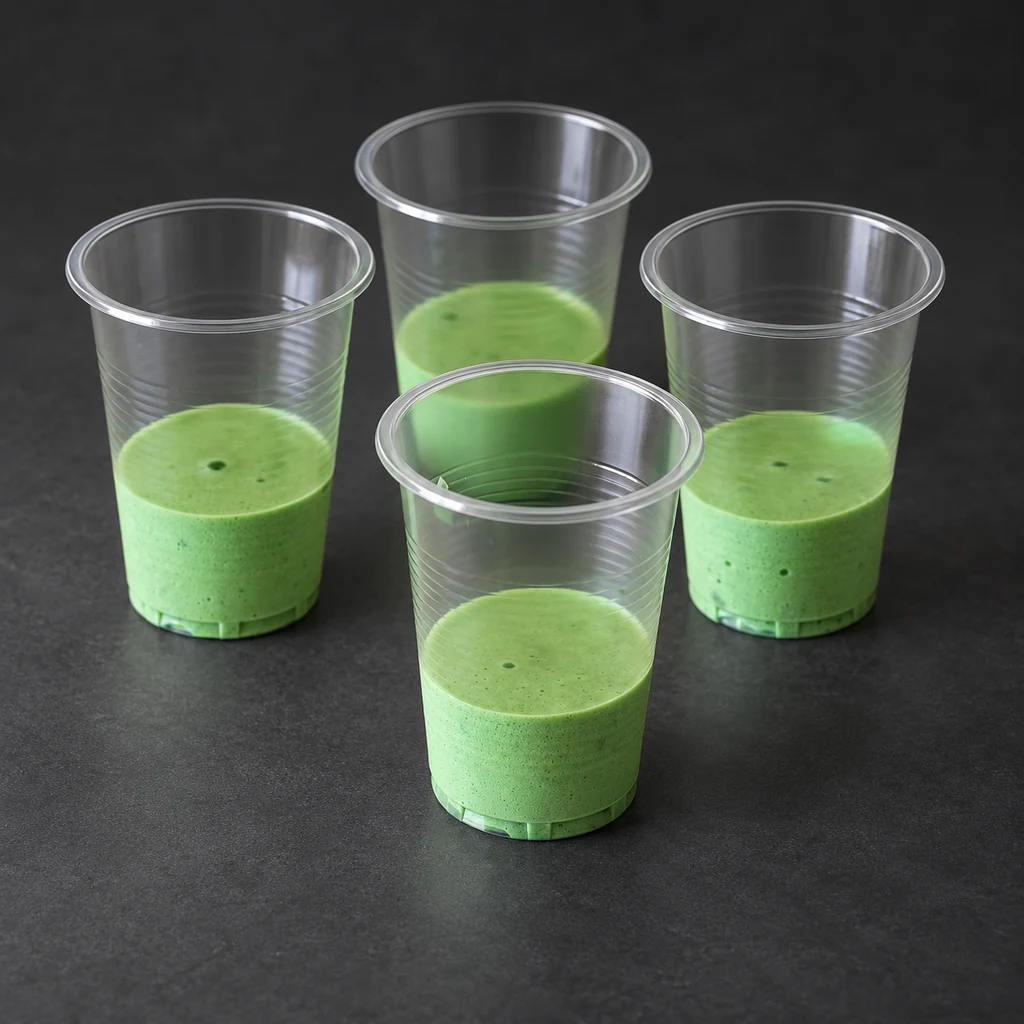
- Fill the cups. Divide the batter between suitable microwave-safe cups, filling each only one-third of its height. Leave room for a substantial rise.
- Microwave. Cook on high power, using approximately 1 minute as an initial guide. The exact time depends on wattage, cup size and how many cups are cooked together. Check that the sponge is set rather than wet; add a short extra interval if necessary.
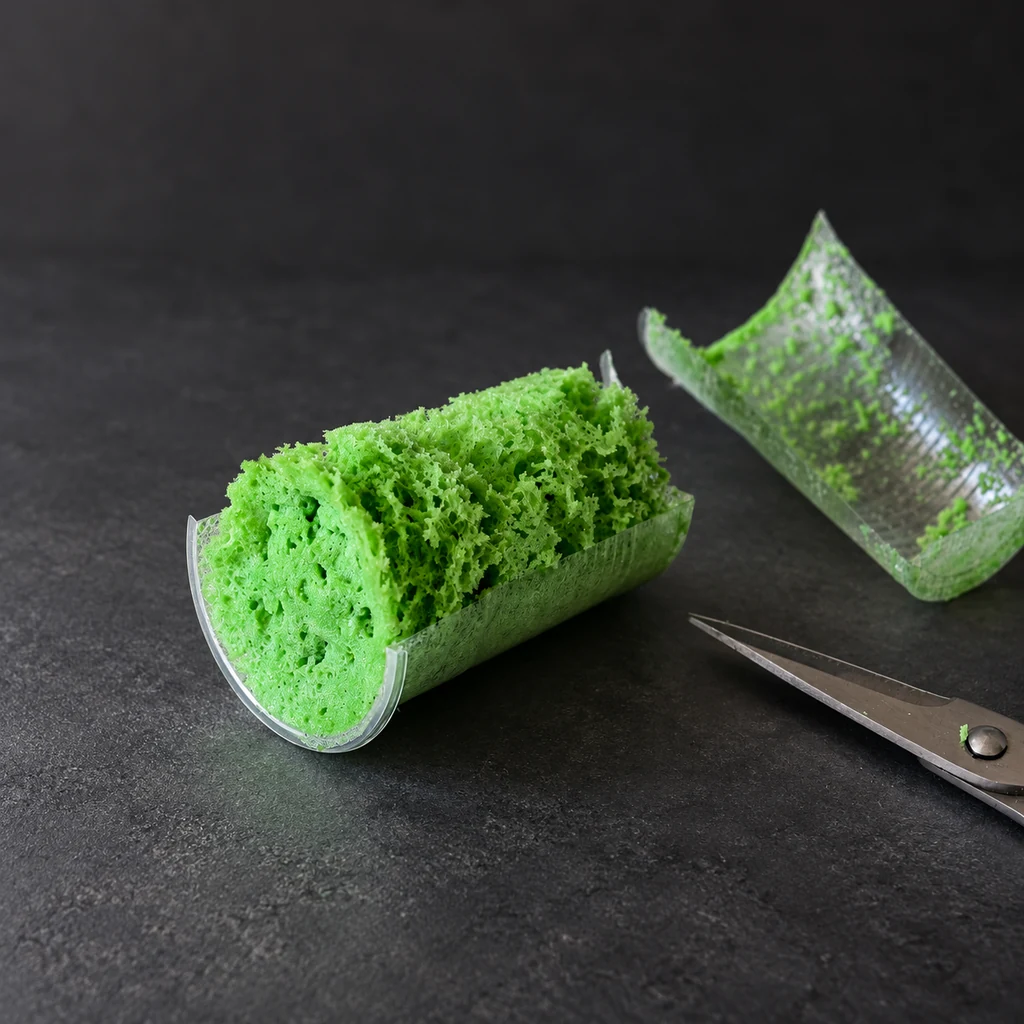
- Cool and remove. Cool the cups upside down on a rack until fully cold. Release the sponge gently; if using suitable disposable paper cups, cut the cup away carefully. Tear the cooled sponge into irregular pieces for decoration.
Measure the 5 g baking powder accurately; baking soda is not an equivalent substitute.
Check after the first minute and continue briefly only if needed. Microwave power changes the cooking time.
Keep the honey or invert syrup in the formula to preserve its moisture and sweetness.
Get an open texture and a believable colour
The beaten egg and baking powder both contribute to expansion. Mix the flour and raising agent evenly before adding them so that the batter does not contain concentrated pockets. Fold only until the colour and batter are uniform.
Use colouring sparingly and build up to the shade you need. A very bright green can look less natural than a quieter green, depending on the cake design. For varied tones, divide a prepared batch and colour the portions differently without changing the base recipe.
Tear the cold sponge to expose its crumb. Irregular edges and different piece sizes usually read as moss more convincingly than a row of identical blocks. Avoid crushing the pieces into dust if you want the airy texture to remain visible.
Adjust for your microwave and container
A microwave's high setting is not the same wattage on every appliance. Container dimensions and the number of cups also affect the result. Start with a small trial using a consistent cup and record the setting and time that set the sponge without drying it.
Do not fill the cup to the top. The batter rises strongly, and a one-third fill leaves space for expansion. Overflow is a container-and-fill-level problem, not proof that the recipe needs less flour.
The centre should be cooked, with no wet batter remaining. On the other hand, repeatedly heating an already set sponge dries it rapidly. Let it cool before judging the final texture, because a hot sponge can feel different from the finished decoration.
Check the difference between baking powder and baking soda before substituting a raising agent.
Four ways to decorate with sponge moss
For a small accent, place a few torn pieces beside berries or another edible focal point. Keep the pieces proportionate to the cake so they support the design instead of obscuring it.
For a fuller covering, arrange pieces closely over a suitable frosting. Build the coverage gradually and leave the crumb visible. A layer of fine crumbs has a different appearance from clustered pieces of open sponge.
For a landscape, vary the piece size and spacing to suggest patches of grass or moss. Keep all supporting decorations food-safe, and make any non-edible supports clearly removable before serving.
For a woodland cake, combine small moss accents with an edible bark-like finish. You can suggest the theme with a few restrained details without covering the whole cake. Make a small layout test before attaching every piece.
| Design | Useful approach |
|---|---|
| Berry accent | A few small pieces around the focal point |
| Moss-covered surface | Closely grouped torn pieces over a suitable finish |
| Landscape | Uneven patches with varied sizes |
| Woodland theme | Small accents against an edible bark-like surface |
Choose a frosting before planning how the decoration will attach.
Use the sponge while the texture is fresh
This airy decoration dries quickly once exposed. Cool it completely, protect it in a closed container and use it promptly for the best soft texture. Honey or invert syrup helps retain moisture, but it does not make the decoration indefinitely stable.
Do not seal warm sponge in a container, where condensation can collect. Keep the decoration away from strong smells, and consider the moisture in the cake surface to which it will be attached.
Make a small fresh batch for the cake you are decorating. If you freeze a portion, wrap it well and check the texture after thawing before using it on the finished cake.
Apply the same care to cooling and protecting other baked sponge components.
Common questions
Do I need a whipping siphon?
No. This recipe uses a whipped egg mixture and baking powder, so a siphon is not part of the method.
Can I use any disposable cup?
No. The cup must be suitable for microwave cooking and have no metallic decoration. Check the manufacturer's instructions rather than assuming all paper or plastic cups are safe.
Why does the sponge taste of raising agent?
Check that you used baking powder rather than baking soda and measured the small quantity accurately. Different products can also taste different. Do not hide an unpleasant batch under frosting.
Will exactly one minute work in every microwave?
No. Wattage, cup size and batch loading vary. Use it as an initial guide, then check that the sponge has set and record the successful timing for your equipment.
Can I make it a colour other than green?
Yes. Use a food-safe, water-soluble colour suited to the design, staying within the product's dosing instructions. The base recipe remains the same.