
Cakes & pastry
Cotton Sponge Cake: Soft Crumb and a Water-Bath Bake
This cotton sponge cake uses 6 eggs and 100 g each of sugar, flour, milk and butter. The yolk mixture is lightened with a glossy meringue, then baked in an 18 cm pan in a hot-water bath at 150°C (300°F) for about 50–60 minutes. The whites should hold a flexible peak rather than look dry and stiff.
7 min read
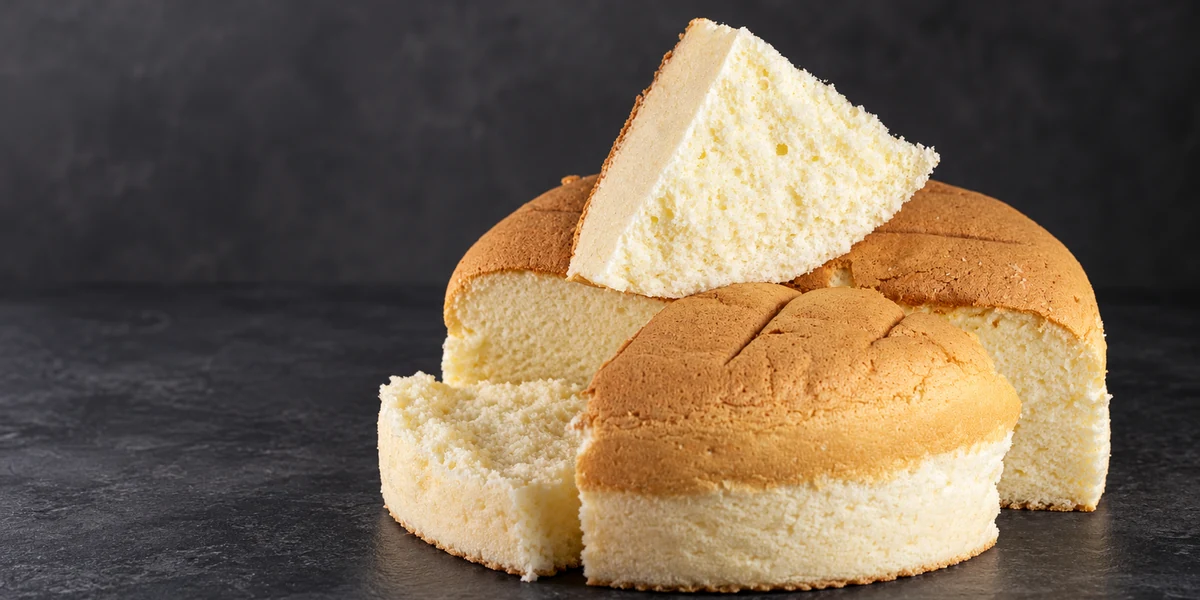
What makes this a cotton sponge?
The appeal is a soft, fine crumb with a gently springy texture. Warm milk and butter are mixed into flour, yolks enrich that base, and separately whipped whites provide the air. A water bath moderates the heat around the pan while the cake sets.
This buttery, water-bath sponge is different from a lean three-ingredient sponge and from a traditional honey castella. Choose it for its own delicate texture rather than expecting those recipes to behave identically.
The finished cake can be pale along the sides and base while its top takes on colour. A little movement in the warm cake is not the same as a centre full of liquid batter. Handle it gently and check that it is baked through before removing it from the oven.
Cotton sponge cake recipe for an 18 cm pan
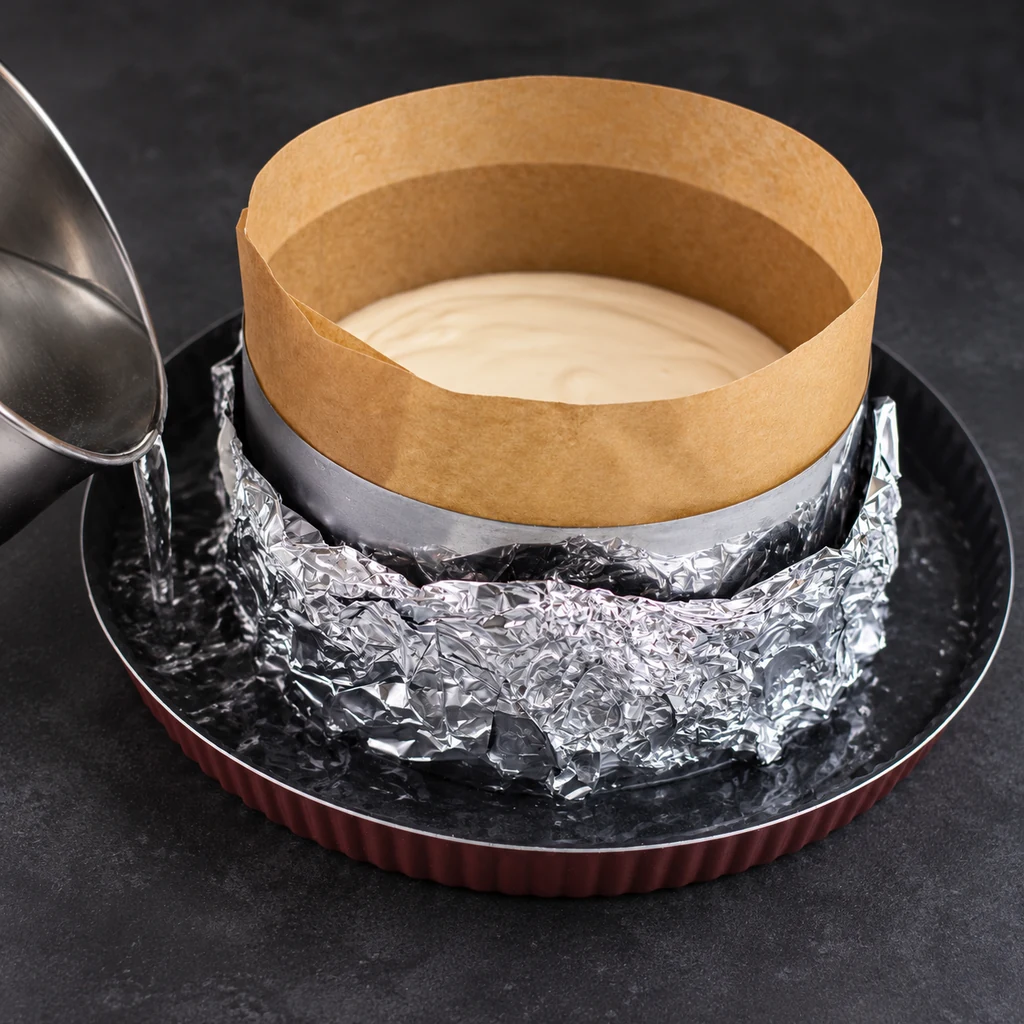
Prepare both pans before mixing: an 18 cm baking pan or securely sealed ring, plus a larger deep pan for the water bath. Line the base and sides of the cake pan with baking parchment. If using an open ring, wrap it securely with foil so bath water cannot enter.
Separate the eggs carefully into clean bowls. A trace of yolk in the whites can make the meringue harder to whip. Use eggs of consistent size.
Butter-and-milk cotton sponge
One cake in an 18 cm pan
Ingredients
- 6 eggs, separated, consistent in size
- 100 g caster sugar / fine granulated sugar
- 100 g plain flour / all-purpose flour
- 100 g milk
- 100 g butter
Method
- Prepare the pans and oven. Preheat to 150°C (300°F). Line the base and sides of the 18 cm pan. If using a ring, seal the outside securely with foil. Put it in a larger, deep roasting pan.
- Warm the milk and butter. Heat the milk and butter gently together until the butter is completely melted. Do not bring the mixture to a boil.
- Make the yolk base. Pour the warm mixture into the flour and stir thoroughly. Add the yolks and mix until smooth, avoiding visible lumps. Do not add the yolks to a boiling mixture.
- Whip the whites. Whisk the whites in a clean bowl until lightly foamy. Add the sugar in three additions and continue whisking to a glossy, substantial meringue. The peak should remain soft and flexible, rather than standing in a dry, rigid point.
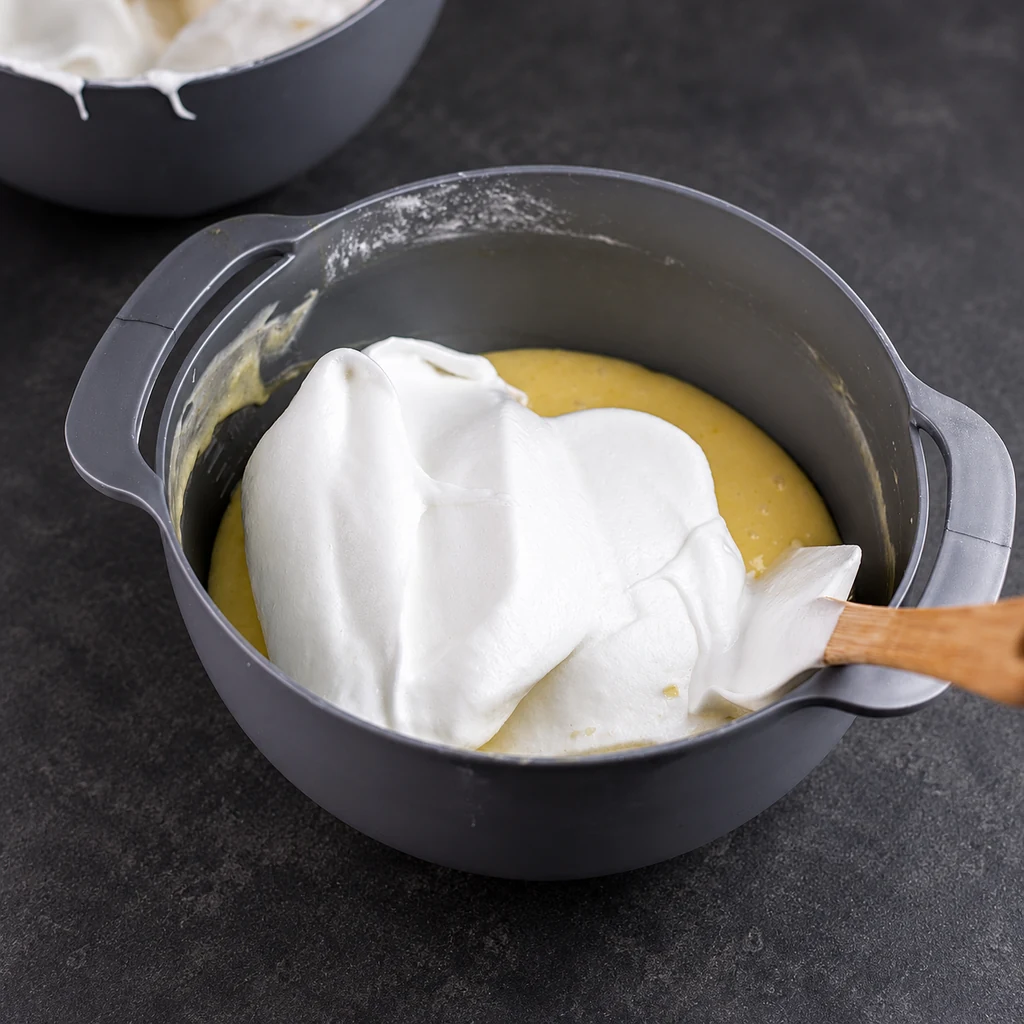
- Fold together. Combine the meringue and yolk mixture in two additions, using a spatula and gentle bottom-to-top folds. Reach the base of the bowl and stop when the batter is evenly combined, without white streaks.
- Bake in hot water. Transfer the batter to the prepared pan. Carefully add hot water to the surrounding roasting pan, keeping it out of the cake batter. Bake for approximately 50–60 minutes. Avoid opening the oven early.
- Check and cool gently. Near the expected end, check the centre for doneness; a skewer should not carry wet batter. Remove the cake pan from the hot bath carefully and allow the cake to cool before cutting. Do not pour bath water over the cake during removal.
There is no baking powder in this formula; the meringue supplies the lift.
Use a stable water-bath setup and keep the water below the top of the sealed cake pan.
Begin checking at 50 minutes, allowing longer if the centre is not set.
Aim for a glossy, flexible meringue
The whites need enough structure to carry air into the heavier yolk mixture. Stop too early and the foam is loose; take them too far and the dry clumps are difficult to fold in without repeated mixing.
Watch the texture as well as the volume. A glossy meringue with a peak that bends is more useful here than a rigid, rough-looking foam. Add the sugar progressively so that it disperses while the whites develop.
You do not need to turn the bowl upside down to prove the meringue is ready. Lift the whisk and inspect the peak. Use the foam promptly once it reaches the desired stage.
Check the bowl, separation and whipping stage if the whites stay loose.
Bring the two mixtures together without losing the air
The yolk base and meringue begin with different densities. Folding in stages helps bring them together without forcing the entire mass at once. Work from the bottom of the bowl upwards and turn the bowl as you go.
White streaks indicate that the mixtures are not fully combined. A sudden loss of volume and very fluid batter can follow from excessive handling. The target is an even batter that still carries the air you built into the whites.
Once combined, transfer the batter to the prepared pan and bake promptly. The water bath and oven should already be ready; the finished foam should not sit while you look for a larger tray.
Keep the water bath outside the cake
The bath is part of the baking setup, not an ingredient in the sponge. Its purpose is defeated if water leaks through the base and soaks the batter. Check the foil seal and use an arrangement that remains stable when lifted.
A solid pan is simpler to waterproof than a loose-bottom ring, provided it has the right dimensions and enough capacity. Do not put a flimsy, foil-wrapped ring directly into a bath and assume that the seam is automatically sealed.
Use hot water for the bath and handle the filled tray carefully. Near the end of baking, check the cake without splashing water onto it. Letting the cake stand in a water-filled outer tray after baking is unnecessary when it can be removed safely.
If the cake sinks, turns dense or becomes wet
Review the meringue, folding and baking endpoint before changing the ingredient amounts. A delicate foam can lose volume during mixing or collapse if the structure has not set. Repeated early opening of the oven can also disturb a fragile bake.
A wet base calls for a different check: inspect the pan seal and look for bath-water entry. A soaked bottom is not solved by beating the whites harder. If water has entered, improve the pan setup before trying again.
Allow the cake to cool before slicing so that the tender crumb is less likely to compress under the knife. If you want a sturdier layer-cake base, choose a recipe intended for that use instead of making this sponge carry a heavy, wet filling.
| Observation | First check |
|---|---|
| White lumps in the batter | Meringue too stiff or folding incomplete |
| Low, dense cake | Foam development, deflation and baking endpoint |
| Wet bottom layer | Bath-water entry through the pan |
| Large collapse after baking | Whether the centre was fully set |
| Crumb crushed during slicing | Cooling time and pressure from the knife |
Try an oil-based chiffon-style sponge for a different cake structure.
Protect a cooled sponge when you are preparing cake components ahead.
Common questions
Is this the same as traditional honey castella?
No. This is a butter-and-milk cotton sponge baked in a water bath. It has a different formula and method from honey castella.
Does the recipe need baking powder?
No baking powder is included. The air comes primarily from the separately whipped whites, so their texture and careful folding matter.
Can I skip the water bath?
The recipe is written for a water-bath bake. Removing it changes the heat reaching the cake and should be treated as a different test, not an equivalent method.
How stiff should the whites be?
Glossy and substantial, with a soft, flexible peak. Avoid a dry, clumpy meringue that requires forceful mixing to incorporate.
Why is the bottom wet?
Check first for water leaking into the cake pan. Also check the baking endpoint, but do not confuse an underbaked centre with a pan that has let bath water in.