
Macarons
Why Do Macarons Stick to the Mat?
Macarons commonly stick because they are being removed before cooling, the bases are underbaked, or the baking surface is not clean and suitable. Let the tray cool before testing a shell. Then distinguish a clean, flexible base from wet paste that stays on the mat; these are not the same problem.
5 min read
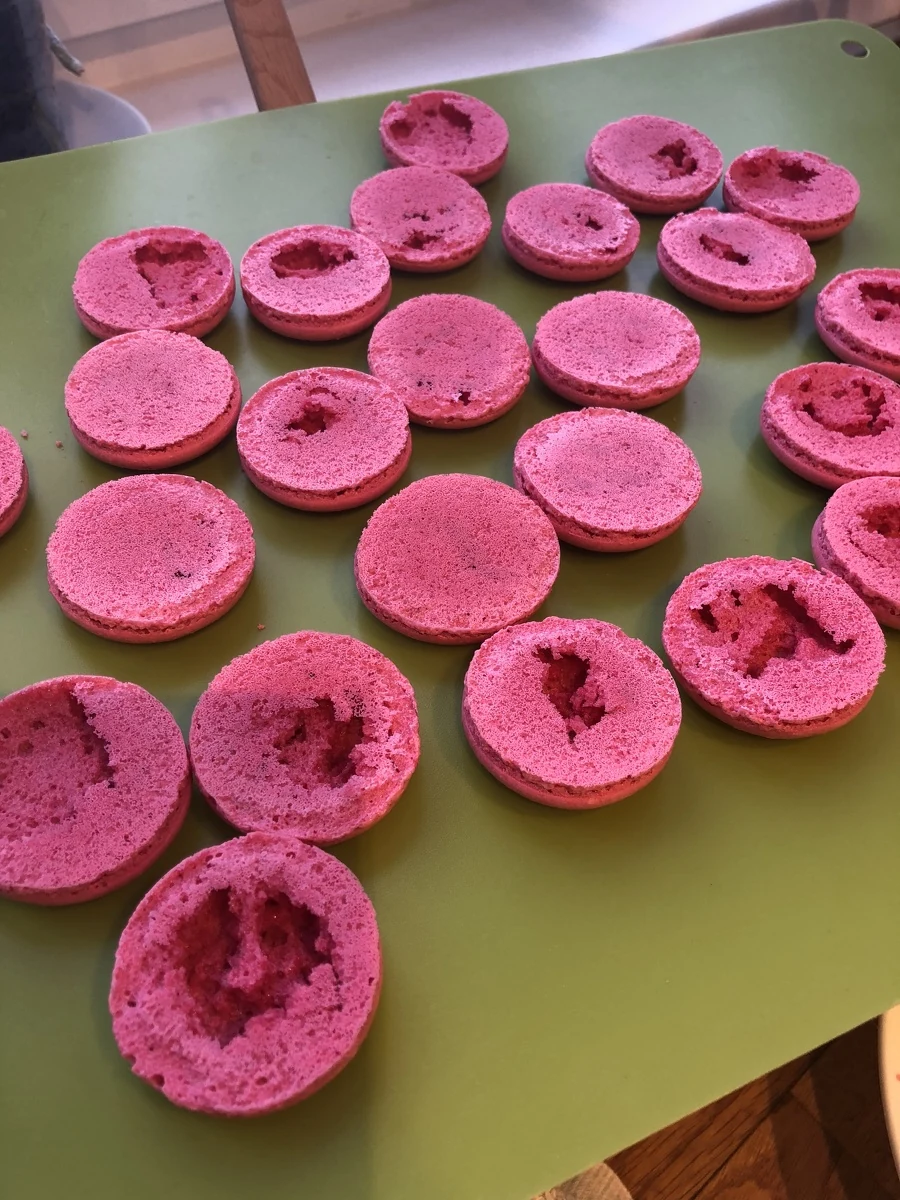
Stop pulling and let the shells cool
The first useful action is to stop peeling the whole tray. A warm shell can tear during removal even when the recipe and baking time were otherwise suitable. Leave the shells on their baking surface until cooled, then test one at the edge and one nearer the centre. Pulling harder makes it difficult to see what the original base was like.
With a flexible mat, support the shell and gently peel the mat away from its base instead of pulling the shell sharply upwards. Do the same carefully with paper. The motion should reveal whether it releases; it should not scrape away a layer of paste to force an apparently clean result.
Read what remains on the mat
A small smear from a damaged warm shell does not prove that the entire tray is underbaked. A thick, sticky layer under several fully cooled shells is more useful evidence. Break open one test shell and look at the base and centre together. Compare both parts of the tray before deciding what to change.
| After cooling | What it suggests | Next check |
|---|---|---|
| Shell releases with an intact base | Removal was attempted too early or too roughly | Keep the same cooling and release method |
| Wet paste remains under several shells | Bake completion or unusually wet batter needs investigation | Inspect the cooled cross-section and review oven conditions |
| One tray area sticks more than the rest | Uneven baking conditions or inconsistent shell size | Map the locations before moving shells |
| Residue or an oily film is visible on the empty mat | The surface needs cleaning and inspection | Follow the mat maker’s cleaning instructions and dry it completely |
Check baking, including the bottom
A dry-looking top is only one part of a finished shell. If the top appears ready while the base is still sticky, record the rack position, baking surface and actual oven temperature. Thick silicone, thin mats and paper do not behave identically. A schedule that worked on one surface may need a new trial on another.
For the next batch, use consistent shell sizes and allow enough time for the whole shell to bake in the conditions of your recipe. If colour develops before the base is ready, simply shortening the bake trades one defect for another. Investigate heat distribution and the baking surface instead of choosing the palest top at any cost.
Use the location of browning to investigate top and bottom heat separately.
Clean the surface without adding a new variable
Inspect the mat after washing and drying, including areas that look clean but feel greasy. Old residue can affect the next batch. Use cleaning products and handling methods appropriate to that mat, rinse properly and let it dry. Do not spray it with oil to turn it into a different surface.
Check that the mat or paper lies flat on a level tray. Replace damaged material rather than trying to compensate with batter changes. If you want to compare silicone with paper, use a planned test and record the difference. Switching surface, oven setting and formula together makes the result difficult to interpret.
If the batter looked wrong before baking
A batch that spread too far, became unusually thin or lost its shape before entering the oven may have a batter problem as well as a release problem. Review ingredient weighing and macaronage. A longer bake may dry the outside without recreating a proper shell structure.
Keep this separate from a normal-looking tray removed while warm. Photograph the piped rounds next time, then the cooled underside. That short before-and-after record tells you whether to focus on mixing or on baking and release. Avoid adding dry ingredients to an already overmixed batch in the hope of restoring the original balance.
Can this batch be rescued?
If cooled shells release intact, continue with your filling and maturation method. If only a few have torn, assess the sound shells separately. A filling should not be used to disguise a wet, structurally unfinished base, especially when the shells will need to hold their shape after maturation.
Returning damaged or cooled shells to the oven is not a guaranteed repair: the tops may dry further while the base remains uneven. For a batch that repeatedly leaves wet paste, a fresh, controlled baking trial is often more informative than repeated heating and peeling. Keep any usable shells according to the complete recipe’s storage instructions.
Common questions
Should I put the tray in the freezer to release the shells?
Cold may make handling feel different, but it does not establish that the shells are properly baked. First assess a fully cooled shell and its base; do not use temporary firmness as a substitute for bake completion.
Is sticking always caused by a silicone mat?
No. Cooling, bake completion, batter and surface cleanliness can all matter. Compare one surface at a time before deciding that the mat itself is the cause.